")
")
")
Home Page Practical Tips for eCommerce Newsletters Delete Easily Invalid Email Addresses from Mail...
Delete Easily Invalid Email Addresses from Mailing Lists
Delete easily invalid bulk E-mail Addresses from your Mailing List of your Newsletter, that you receive with the subject Delivery Failure in your inbox.
Deleting regularly invalid e-Mail addresses from the mailing list of your newsletter simplifies campaign analyses and reduces the probability to be considered Spammer. Good reasons to do so.
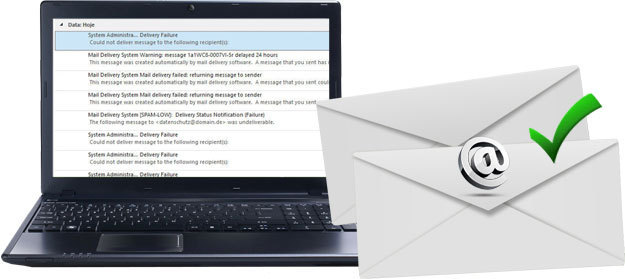
We all have seen this before: The last mail of our Newsletter even hasn't left the mail server, and we already receive the first "Delivery Failure" messages.
With good luck, it looks like this:

The issue is, how do I get a list with all these addresses without opening each message, search for the address, select it and copy it to my mailing list?
We suggest to use this method:
- Export the content of the Inbox folder to a CSV text file
- Extract all the e-mail addresses from the text file, using an application like Easy Email Extractor
- Export the addresses from Easy Email Extractor to a CSV text file
- Open the text file in Excel and add the header row from your mailing list and attribute the status "Cancelled" to these addresses
- Import the mailing list into your newsletter tool
Only to delete invalid e-mail addresses doesn't work out, because when you gather new e-mail addresses, they could make parte of this you have deleted.
Some Best Practice Tips
Before you start, let us give you some best practice tips:
- Before sending the next newsletter, validate your mailing list with a tool, for example https://www.atompark.com/bulk-email-verifier/
- Use a sender e-mail address that you use only for this purpose (newsletter@company.com). So you get the mails separated from your other mails.
- Install this account using IMAP
- Your newsletter tool should allow you to define the names of each addressees. This reduce the probability your newsletter is considered Spam.
- Before you export the messages from your Inbox, be aware to move all other messages that are not delivery failure notifications, to a separate folder, for example automatic response messages.
1. Export Content of Inbox Messages to a CSV Text File
We show how to export the content with Microsoft Outlook 2016. Other e-mail clients provide similar functions for this.
1.1 Open the menu "File"

1.2 Chose the "Open & Export" tab and click on the "Import/Export" button.

1.3 Select the "Export to a file" option.

1.4 Select the "Comma Separated Values" option.

1.5 Select the Inbox from your newsletter account.

1.6 Select a folder and a name for the export file.

1.7 Confirm and click "Finish"

1.8 Outlook is exporting your messages data to the file.

2. Open and Export Mail Addresses with Easy E-Mail Extractor (or similar application)
If you don't have any application to extract e-mail addresses from a file, you can use Easy E-Mail Extractor.
http://www.novirusthanks.org/products/easy-email-extractor/
2.1 Open the file you exported from Outlook

2.2 Click the "Select All" button and then "Export"

2.3 Choose a folder and filename to export the e-Mail addresses.

3. Preparing the Data in Excel
3.1 Open the export file in Excel. You can simply click on the file in Windows Explorer.

3.2 Add the header row from your mailing list and copy the e-mails under the E-mail address column. In column D "Unsubscribed" use the status "1" to confirm that these addressees won't receive newsletters.

Now you can sent the next newsletter and be sure that no mail will be sent to these contacts - and that you won't receive delivery failure notifications.
COMPANY 6 LEGAL |
MOST READNew: epages Now Addons for Customized Functions and Design Web Design for Sage 50 Shop (epages) Design for Mobile Version epages Shops "Sign in" and "My Account" in Mobile Version |
ADDRESSEstrada da Ponte, nº 2 Quinta Grande - Alfragide 2610-141 Amadora (Lisbon) Portugal - Google Map Landline tel.: (+351) 214 067 846 DE mobile phone: (+49) (0)157 381 968 45 |